Horse Management
📍 Find this in the app: Admin Panel → Sales Horses (
/admin/horses) · Add a horse (/admin/horses/add)
This guide explains how to manage the horses in the system from start to finish. We will cover how to add a new horse, view existing horses, change their details, and remove them if needed.
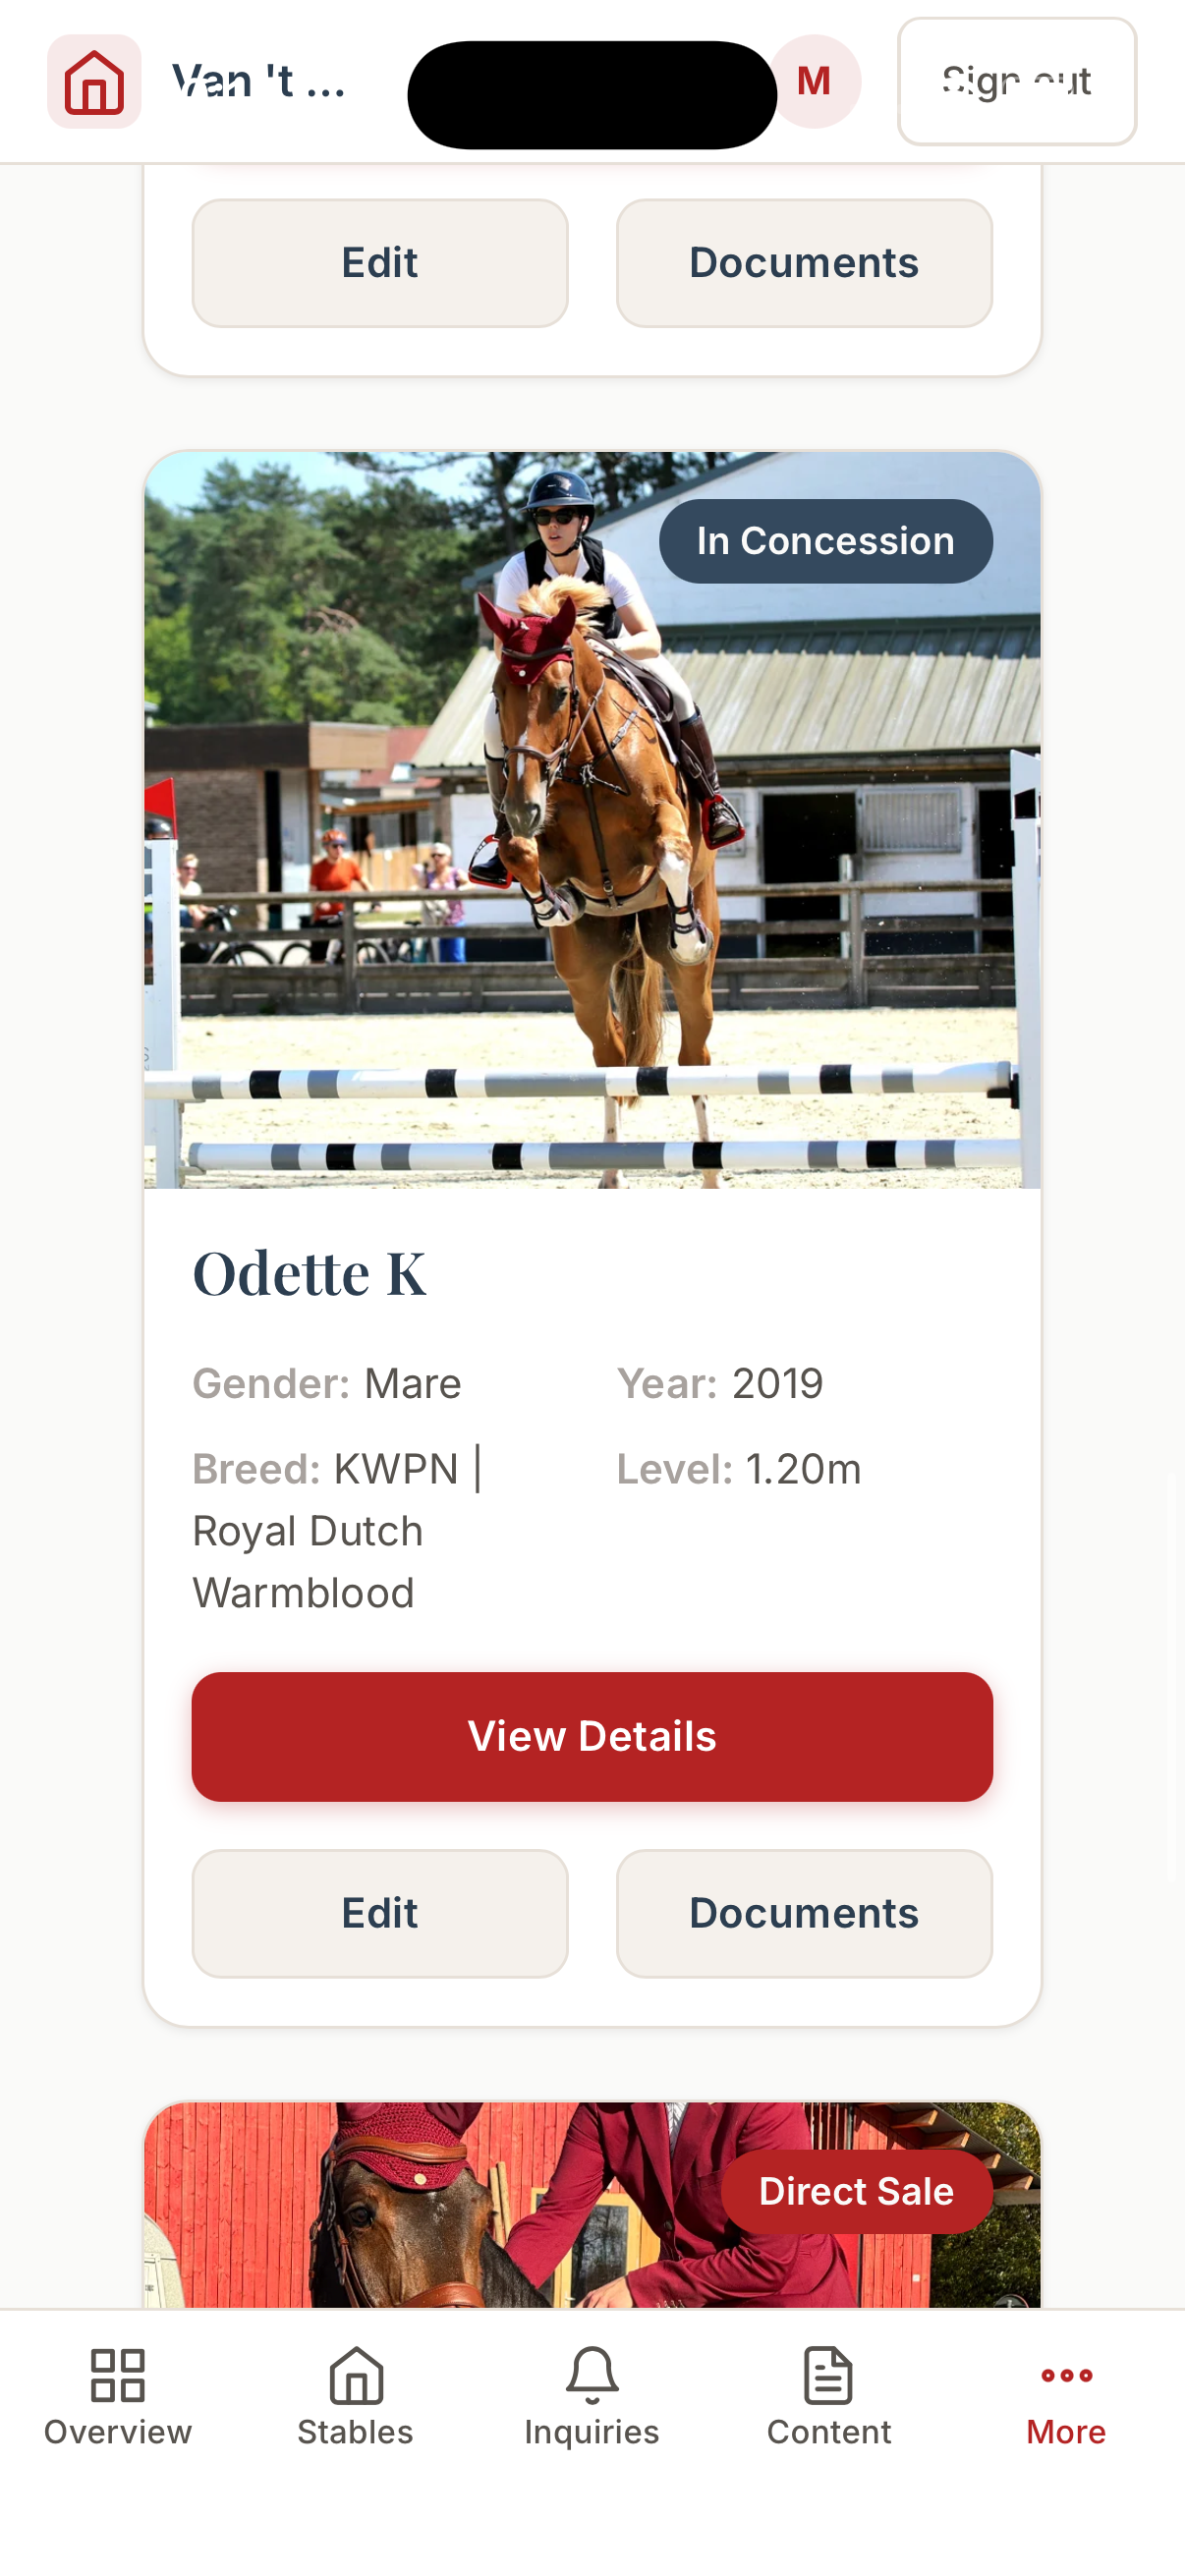
The sales-horse list in the native mobile app:
1. Adding a New Horse (Create)
When you have a new horse at the stable or one you want to sell, you can add it to the system.
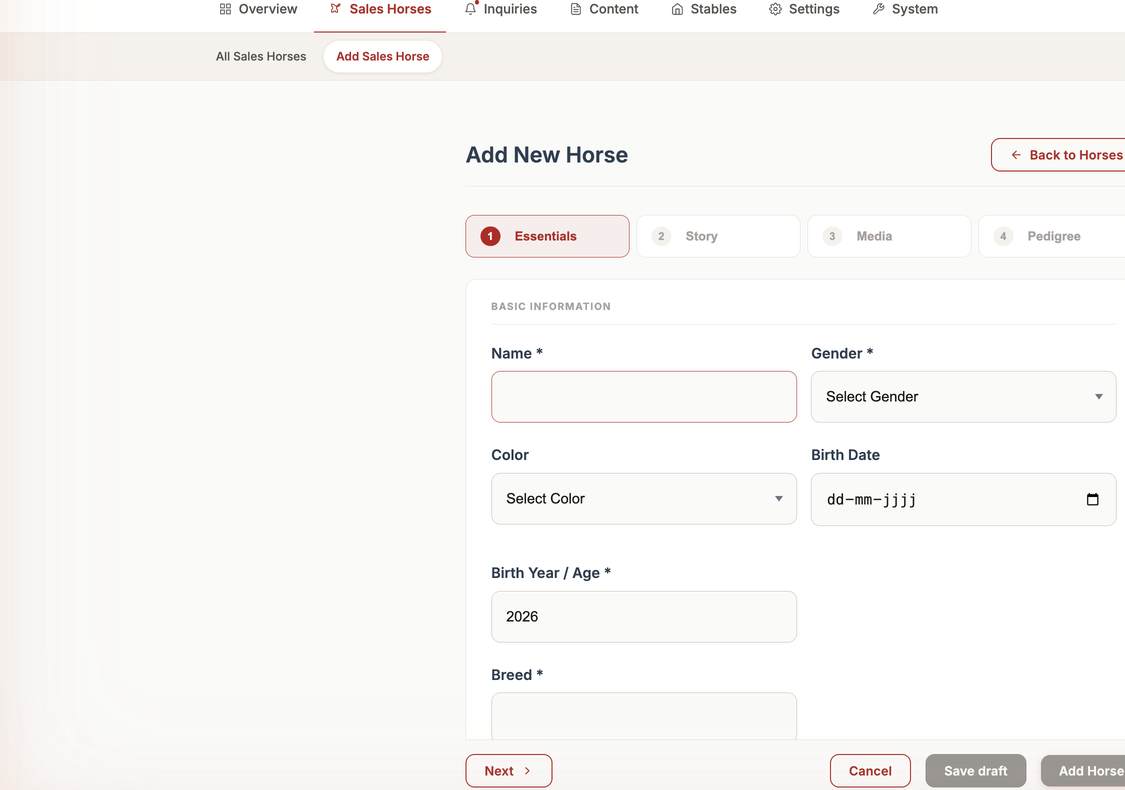
To add a horse, navigate to the Stables section of your dashboard and look for the option to "Add Horse". You will be presented with a form where you can fill in the details of the horse.
Tip: AI Passport Scan
If your stable has the AI Passport Scan PRO feature enabled, you don't have to type everything by hand. Simply click Scan Passport while adding a horse to take or upload a photo of the horse's passport. The system will automatically read details like the name, gender, breed, birth year, color, height, sire, and UELN, and instantly fill out the form for you.
Here is what each field means in plain English:
- Name: The name of the horse.
- Owner: The person who owns the horse. You can select this from a list of members.
- Is Stabled: Check this box if the horse is currently living at your stable.
- Is For Sale: Check this box if you want this horse to appear on the public website as being for sale.
- Draft: Check this box if you are still working on filling out the horse's details and don't want it to be seen by the public yet.
- In Training: Check this if the horse is currently receiving training. This allows the horse's owner to see daily updates about what the horse is doing.
- Owned by the stable: Check this for school horses, breeding stock, and sales horses kept on your own account — not for a boarder's horse. Combined with leaving Is For Sale, Is For Lease, and Standing for Breeding unchecked, this is what puts a horse on the public "Our Horses" page — see Our Horses.
- Gender: Whether the horse is a Stallion (male, not castrated), Mare (female), or Gelding (castrated male).
- Color: The coat color of the horse (e.g., Chestnut, Bay, Grey, Black).
- Birth Date & Year: When the horse was born. The system will automatically calculate the horse's age from this.
- Breed: What type of horse it is (e.g., KWPN, Zangersheide).
- Sire: The name of the horse's father.
- Sire of Dam: The name of the horse's grandfather on the mother's side.
- Height: How tall the horse is, measured in centimeters.
- Training Level: The highest level of training or competition the horse has reached (e.g., 1.10m, 1.40m +).
- Discipline: The type of riding the horse is trained for (like Showjumping or Dressage).
- Description: A paragraph telling the story of the horse. This is what potential buyers will read.
- Notes: Private notes for your team that the public will not see.
- Features: A list of bullet points highlighting the horse's best qualities (e.g., "Great with kids", "Jumps well").
- Achievements: A list of awards or notable competition results.
- Sale Type: Whether the horse is being sold directly by you or on behalf of someone else (concession).
- Price: The cost of the horse.
- Sold: Check this box when the horse has been purchased. It will change how the horse is displayed and will start a timer to clean up old documents later.
Once you have filled out the fields, click "Save" to add the horse to the system.
2. Viewing Horses (Read)
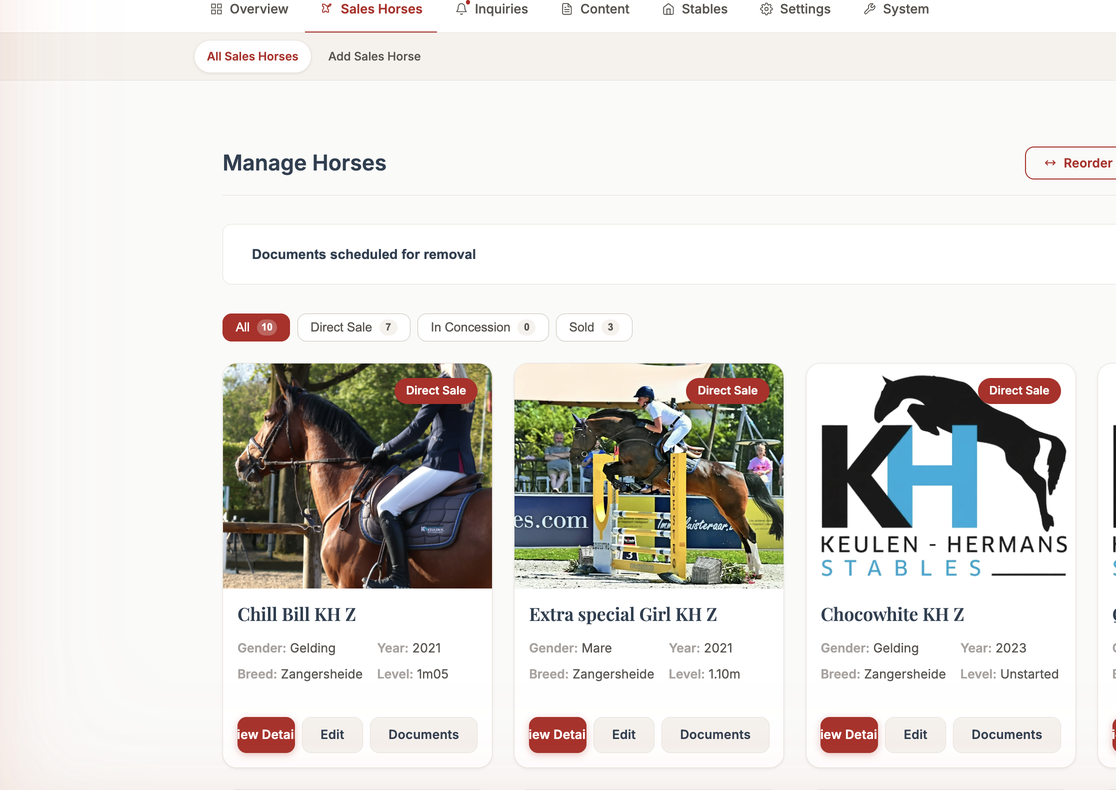
You can see all the horses you've added in the Stables dashboard. This gives you a quick summary of every horse, whether they are for sale, and if they are currently at the stable.
Clicking on a specific horse will open its detailed view, where you can read everything that was entered during the creation step, see their photos, and review their history.
If you have a large number of horses, the list loads them a page at a time and shows a Load More button at the bottom rather than fetching everything at once — this keeps the page fast to open no matter how many horses you have on file.
Sharing a listing to social media
You no longer need to open a horse's public page just to share it. From the list at /admin/horses, each horse card has a Share option that opens a small panel where you can pick one of its photos, edit the caption, and send it straight to WhatsApp, Facebook, your device's native share sheet (which offers whatever apps you have installed, e.g. Messages, Instagram), or copy the link and caption to your clipboard to paste yourself.
3. Changing a Horse's Details (Update)
Information changes over time. A horse might grow taller, reach a new training level, or be sold.
To update a horse:
- Find the horse in your Stables dashboard and click on it.
- Click the "Edit" button.
- You will see the exact same form used when you created the horse. You can change any field, like checking the Sold box or updating the Price.
- Click "Save" to apply your changes. The updates will instantly appear across the system and on the public website.
4. Removing a Horse (Delete)
If a horse was added by mistake or you want to completely erase its record from the system, you can delete it.
Warning: Deleting a horse is permanent. It will remove the horse's profile, its photos, and its history.
To delete:
- Open the horse's profile from the dashboard.
- Look for the "Delete" option.
- The system will ask you to confirm that you really want to delete the horse to prevent accidental clicks. Once confirmed, the horse is gone.
🤖 Need help?
Remember that the AI Support Chatbot is available in the bottom corner of this (and every) admin screen. If you get stuck or have questions about how this page works, just click the chat bubble and ask!