Boarded Horses & Stable Units
📍 Find this in the app: Admin Panel → Stables → Boarded Horses (
/admin/stables/horses) · Stable Units / 2D Map (/admin/stables/units) · Staff View → Horses (/staff/horses)
This section helps you manage the physical boxes (stalls) in your barn, tracking which horse is in which box, who owns the horse, and what their specific feeding instructions are.
The Boarded Horses roster
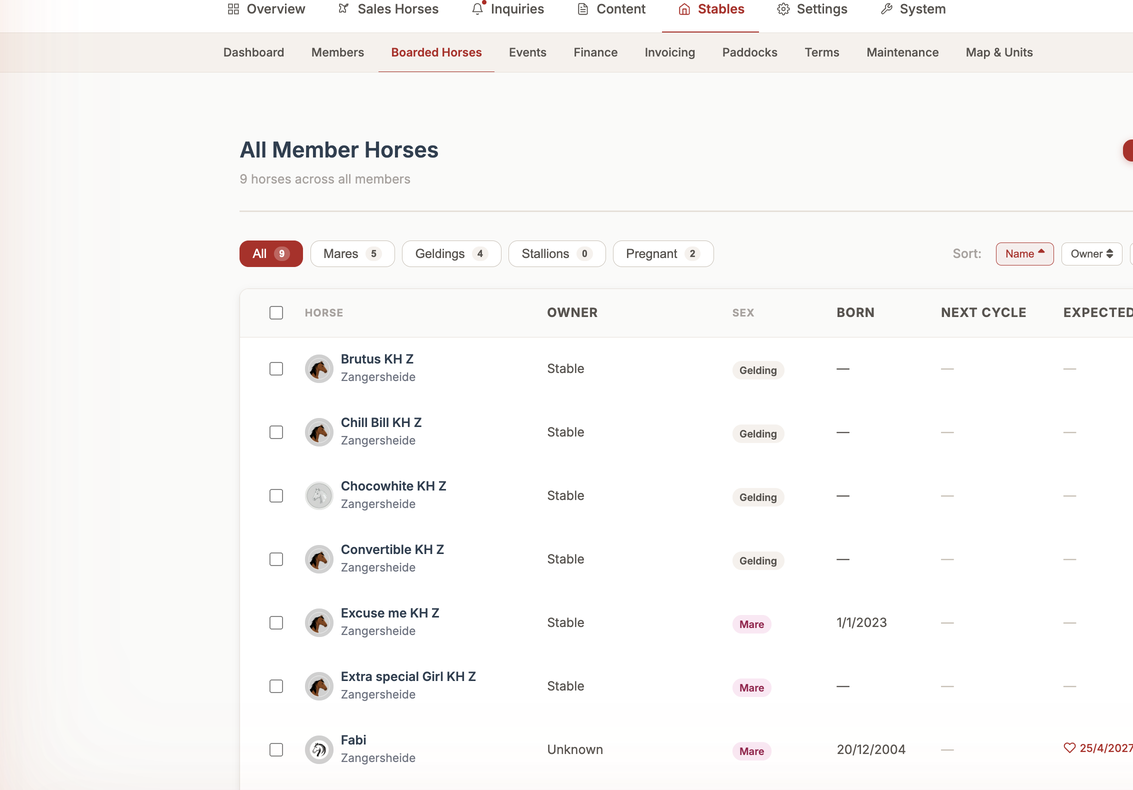
Under Stables → Boarded Horses you'll find All Member Horses — a single list of every horse boarded at your stable, across all members. You can filter by sex (Mares, Geldings, Stallions) or pregnancy, sort by name, owner, next cycle, due date or vaccinations, and select horses to log care or schedule tasks in bulk.
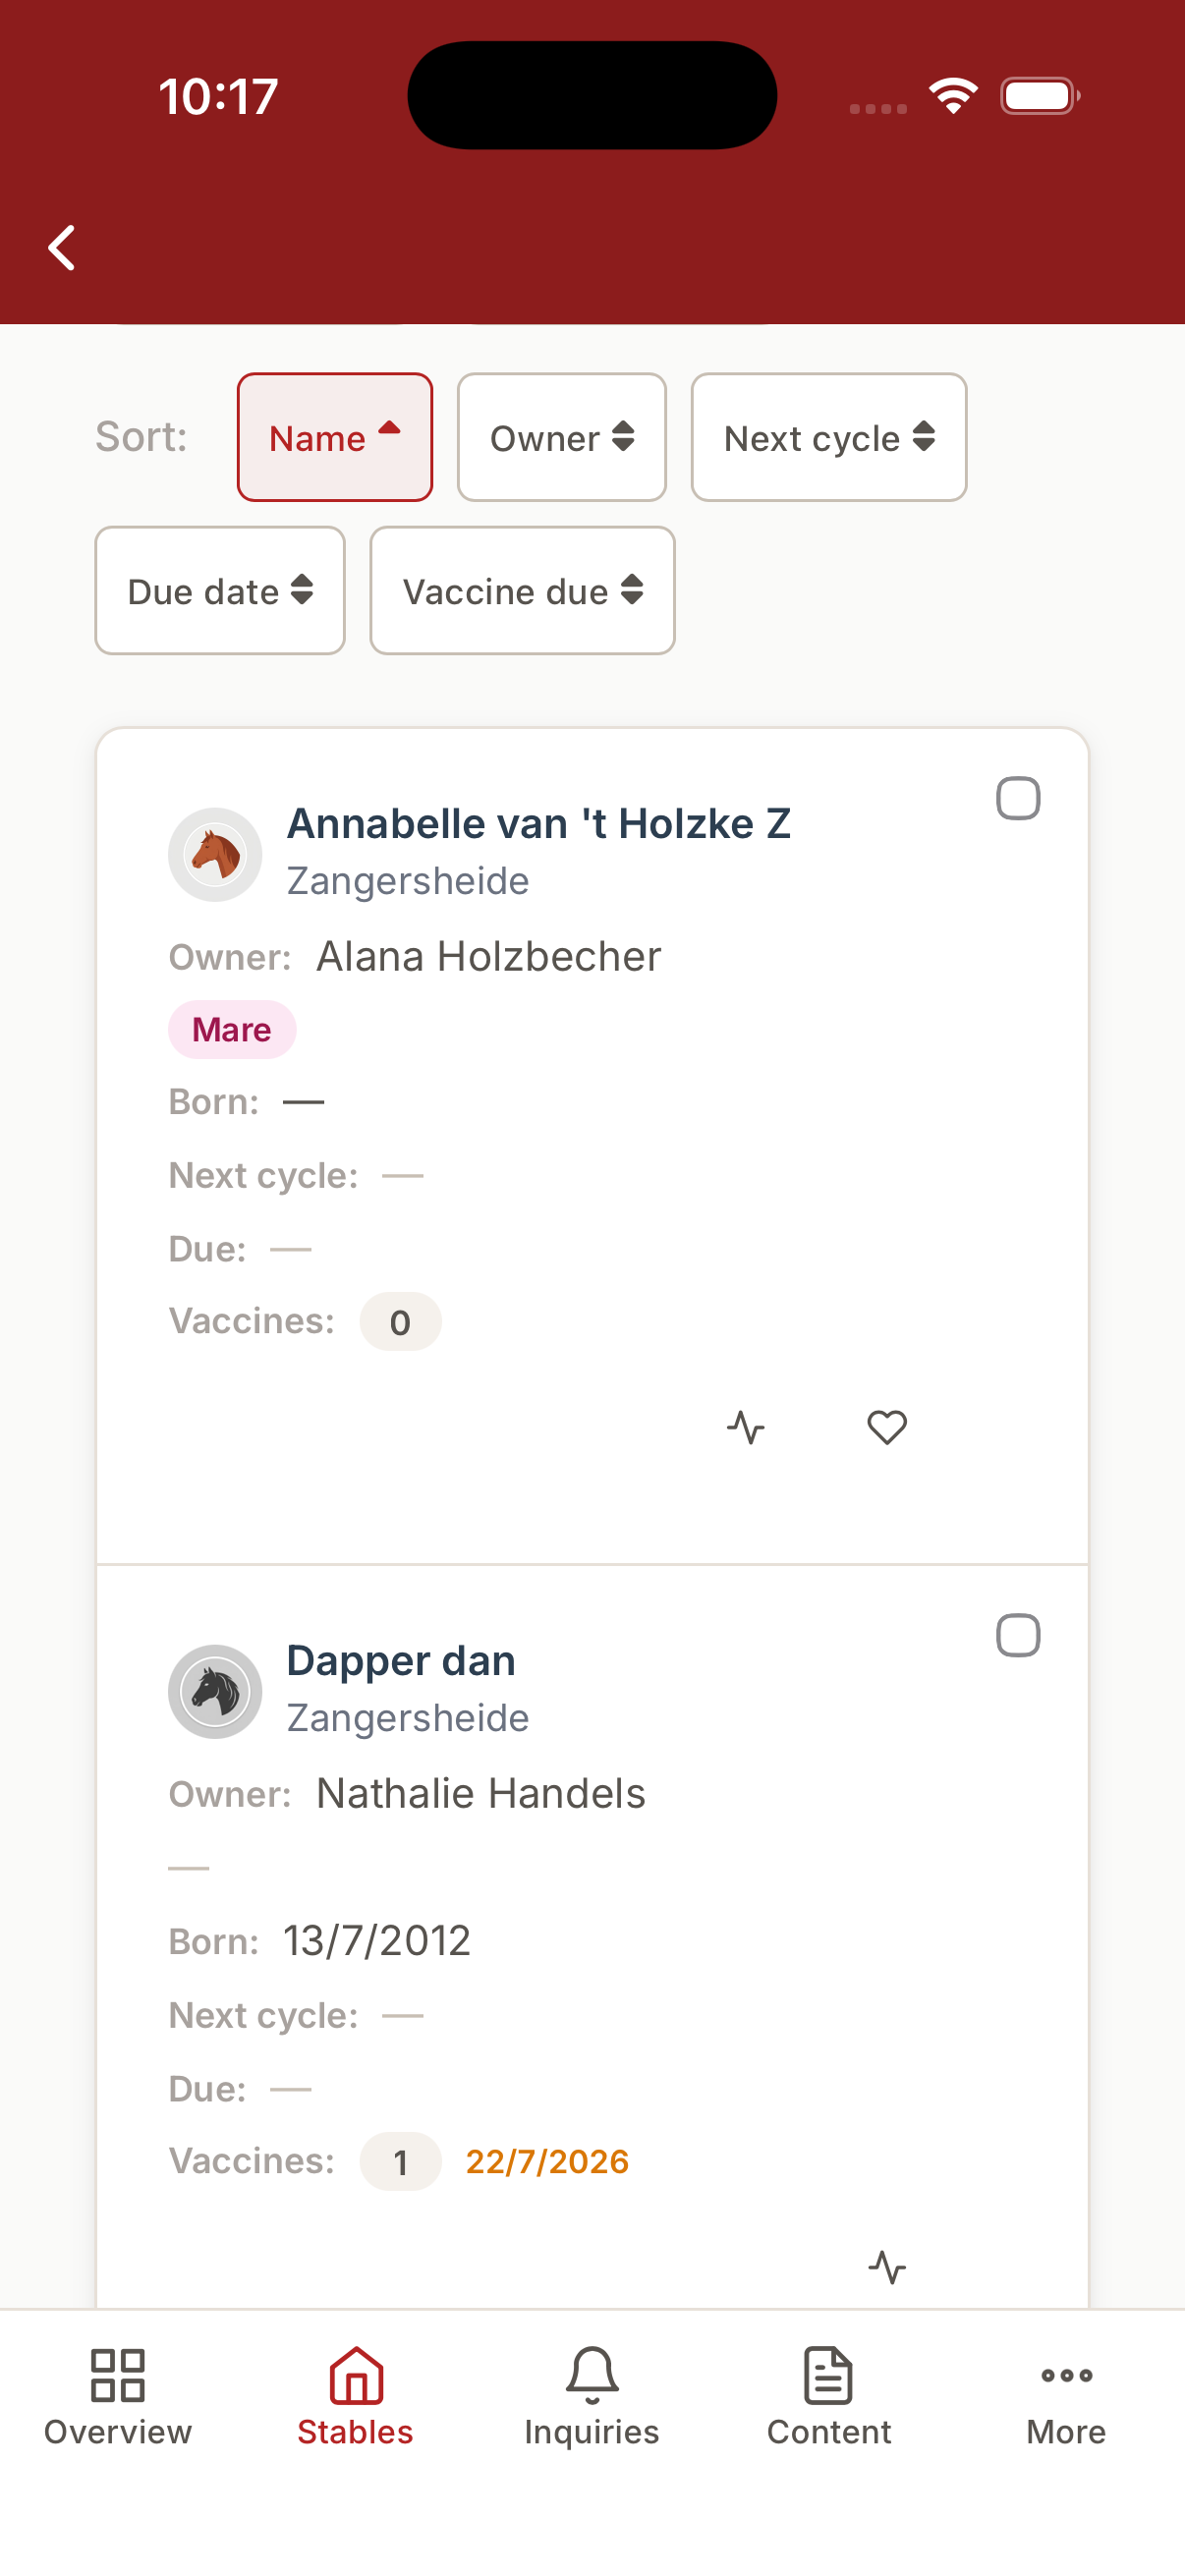
The Boarded Horses roster in the native mobile app:
Filtering the roster to pregnant mares surfaces cycle, sire and due-date details — see Mare Cycle & Pregnancy Tracking for how that data is logged.
Adding a horse from the roster
You no longer have to open a member's profile to register their horse. Click Add Horse in the top-right of the roster to open a quick form:
- Owner: pick which member the horse belongs to from the dropdown. (If you don't have any members yet, the form will prompt you to add a member first, since every boarded horse needs an owner.)
- Horse Name, Sex, Breed, Sire, Sire of Dam, Birth Date and Notes: the basic details for the horse.
Click Add Horse to save. The new horse appears in the roster immediately and is attached to the member you chose.
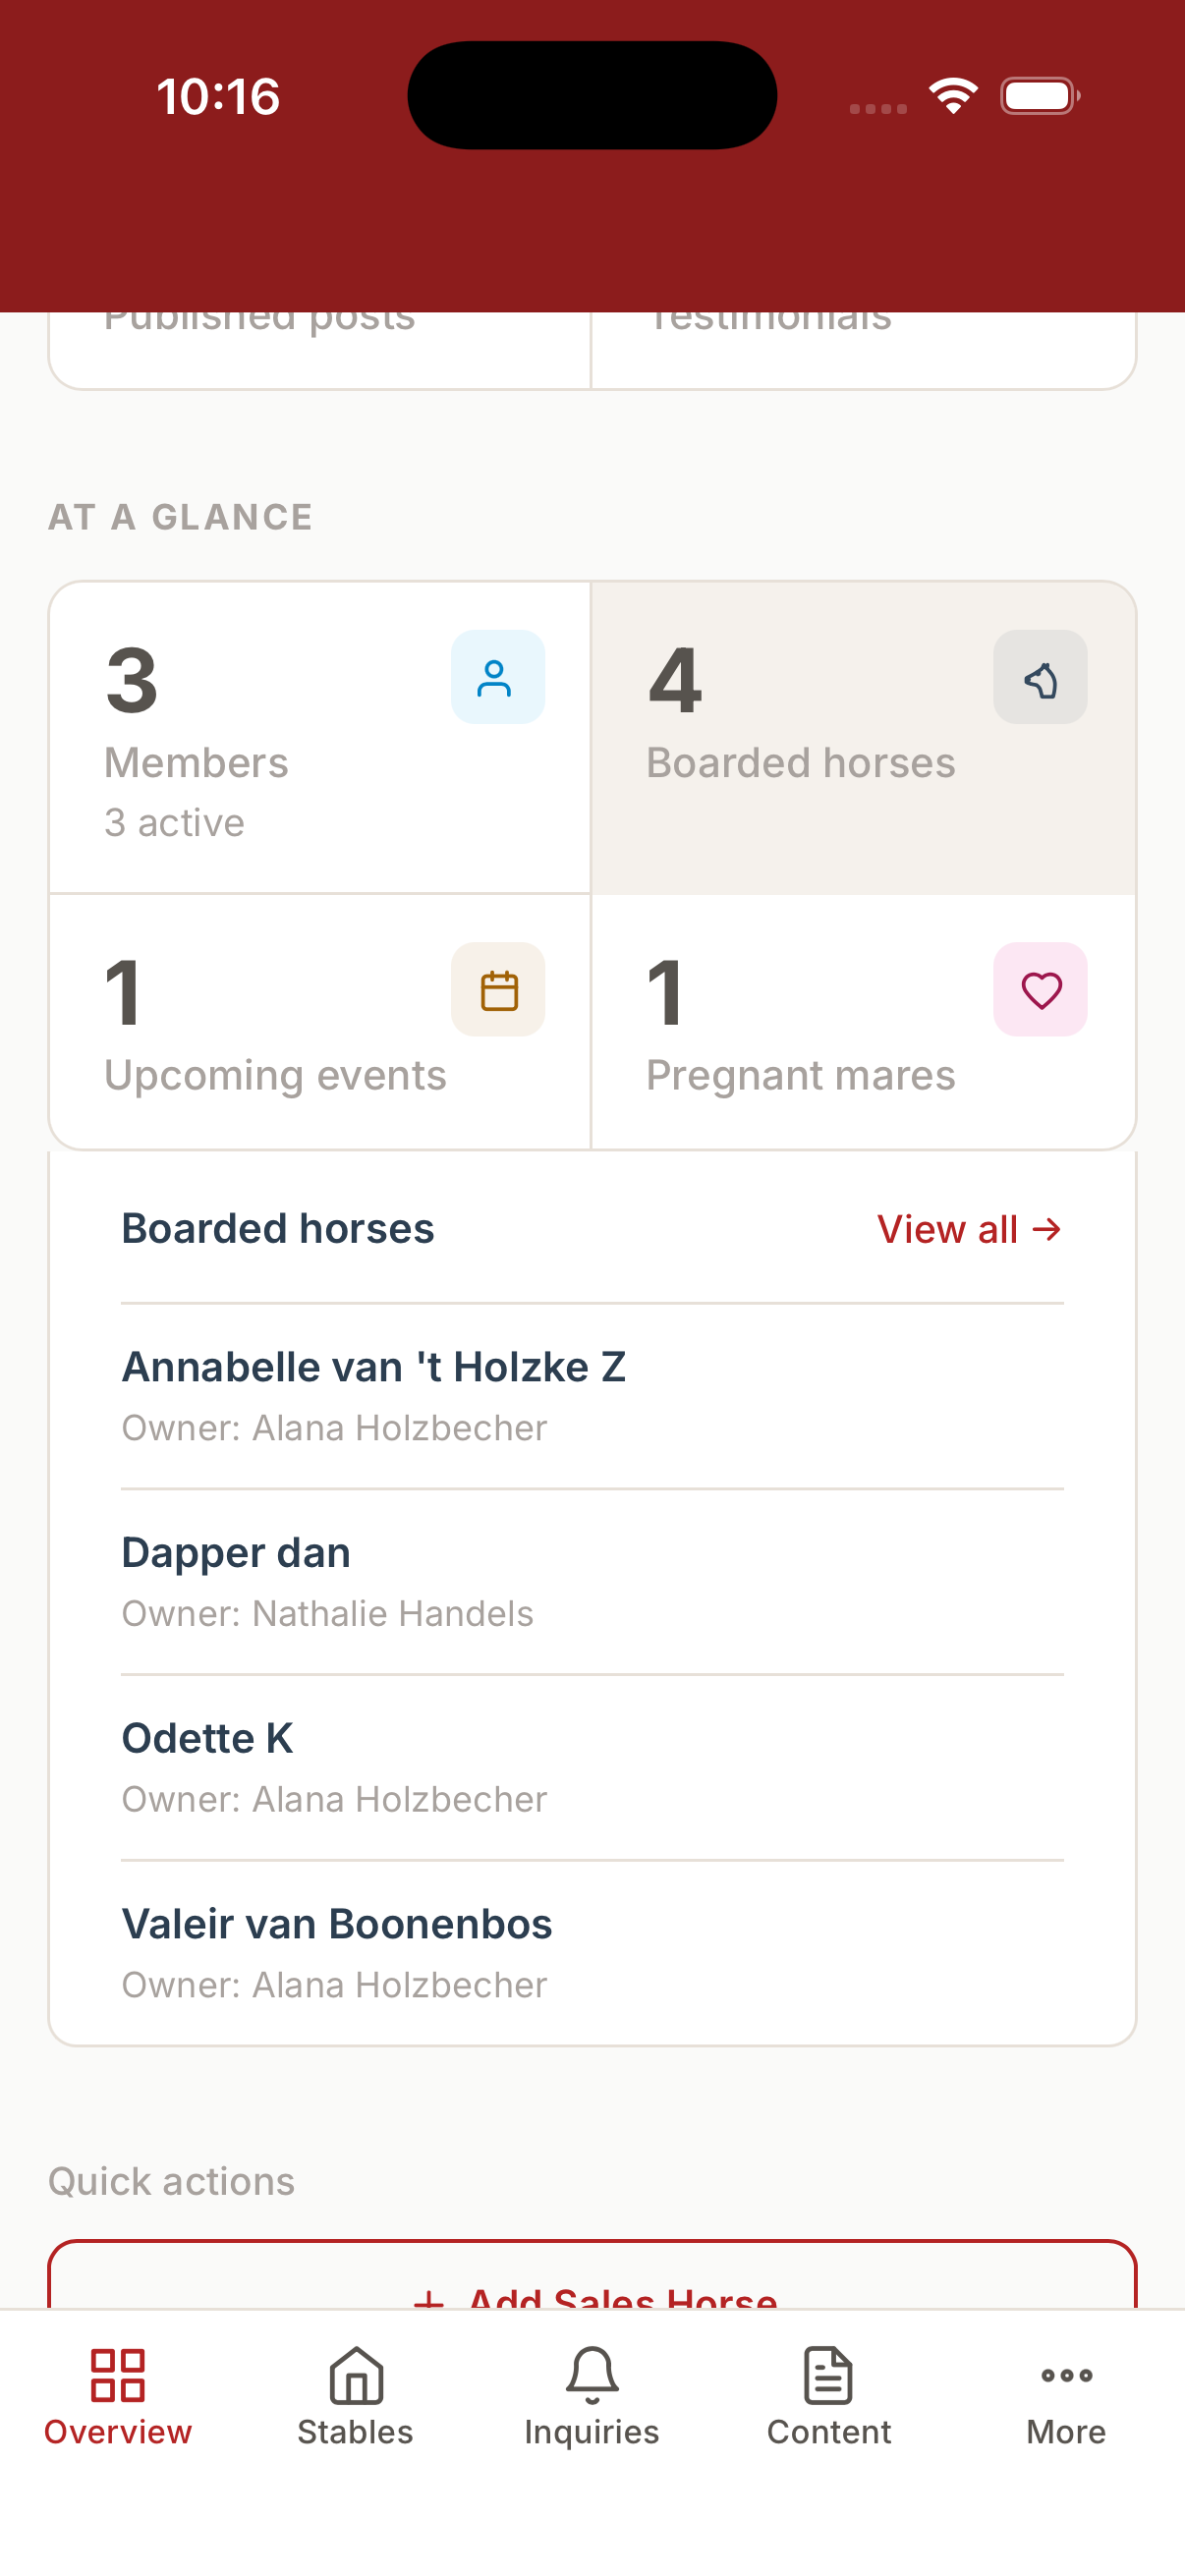
Tip: The admin Overview dashboard has a Boarded horses card under "At a glance". Clicking it now previews the boarded horses inline (name and owner), with a View all → link straight to this roster.
Adding Horses in Bulk — CSV Import & AI Photo Scan
If you're onboarding a stable with many horses already on the books, adding them one by one is slow. Click Import CSV in the top-right of the roster to open the Import Horses window, which offers two ways in: a spreadsheet upload, and (if your stable has the AI Passport Scan PRO feature turned on) scanning a photo of each horse's paper passport instead of typing anything at all.
Both paths feed the same preview table before anything is saved, so nothing reaches your horse list without you looking at it first.
Option A: Import via CSV (spreadsheet upload)
Click Select CSV File and choose a spreadsheet exported from Excel, Google Sheets, or your previous system, saved as a .csv file. A few things to know before you upload:
-
File size: the file must be under 2 MB.
-
Row limit: a single import can bring in up to 50 horses at a time. For a bigger list, split it into batches and import each one separately.
-
Column headers matter: the first row of your spreadsheet must use these exact column names (any column you leave out is simply skipped):
Column What goes in it NameThe horse's name (required) Genderstallion,mare, orgelding(required)Breede.g. "KWPN" Birth YearA 4-digit year ColorChestnut,Bay,Grey,Black, orOtherHeight (cm)A number SireFather's name Sire of DamMaternal grandfather's name PriceA number, if the horse is for sale Is For Saletrue/yes/1or leave blankIn Trainingtrue/yes/1or leave blankDisciplinesOne or more disciplines, separated by commas NotesFree text UELNThe horse's official Unique Equine Life Number, if known MicrochipThe horse's microchip number, if known
Once the file is read, every row appears in the preview table, each one marked Valid (green) or Error (red, with the reason — usually a missing Name or an unrecognized Gender). Only the valid rows count toward the horses that will actually be created; fix a bad row in your spreadsheet and re-upload if you want it included.
Option B: AI Photo Scan — scan a passport instead of typing
PRO stables with AI Passport Scan enabled see a second option in the same window: Scan Passport. Instead of typing a horse's details from its paper passport document, take (or upload) a clear photo of the passport page, and the system reads it for you.
What happens when you scan a photo:
- Click Scan Passport and choose or take a photo of the passport page.
- The photo is automatically resized down to a manageable size (so it uploads quickly, even on a slow barn Wi-Fi connection) and sent off for reading.
- While it's working, the button shows a loading spinner and reads "Scanning…" — this typically takes a few seconds.
- The horse's details are read from the document — name, sex, breed, birth year, color, height, sire, sire's sire, and, when printed on the passport, the UELN and microchip number — and a new row is added straight to the top of the preview table, marked Valid just like a CSV row.
You can repeat this for as many passports as you have — each photo adds one more row to the same preview table, which you then review and import together, mixed in with any CSV rows if you used both. If a document photo is blurry or a field genuinely isn't printed on it, the scan simply leaves that field blank rather than guessing — you can still add the missing detail by hand afterwards from the horse's profile.
A single-horse version of this also exists: when adding or editing one horse on the Sales Horses form, an admin can scan a passport photo to fill in that one horse's fields directly, without going through the bulk import list — see Horse Management.
Reviewing and completing the import
Whichever way the rows got into the preview table, nothing is saved until you click Import N Horse(s) at the bottom — where N is the number of currently-valid rows. Before it saves:
- The system double-checks every row against your existing horses by UELN and microchip number, and refuses to import a horse that would duplicate one you already have on file, so scanning the same passport twice (or importing a horse you'd already added by hand) is caught rather than creating a second copy.
- Rows marked Error are simply skipped — they are never imported, and don't block the valid rows around them.
Click Cancel at any point to close the window without importing anything.
1. Creating a Stable Box (Create)
Before you can assign a horse to a box, you need to create the boxes in the system. Go to Stables → Map & Units and click "Add Row" to create a batch of boxes at once, or add a single box directly on the map.
Bulk-creating a row: when you add several boxes at once, pick a Layout Shape — Single Line, Facing Lines, or U-Shape — and the system lays the new boxes out on the map in that pattern automatically, instead of you having to drag each one into place by hand.
Here is what each field means:
- Number: The physical number of the stall (e.g., Stall 1, Stall 2).
- Name: An optional name for the stall (e.g., "Corner Box").
- Row: Which aisle or barn the stall is located in (e.g., "Main Barn", "Aisle B").
- Horse: The specific horse that lives in this box. You select this from your list of horses.
- Member (Owner): The person paying for or responsible for this horse.
- Feed Configuration: This is a list of feeding instructions. You can add multiple rows:
- Type: What kind of feed (e.g., "Sweet Feed", "Hay", "Supplements").
- Amount: How much they get (e.g., 2 scoops, 1 flake).
- Notes: Any special instructions for this specific box, like "Window must stay closed" or "Needs extra shavings."
- Is Active: Whether this box is currently available for use.
2. Viewing the Stable Layout (Read)
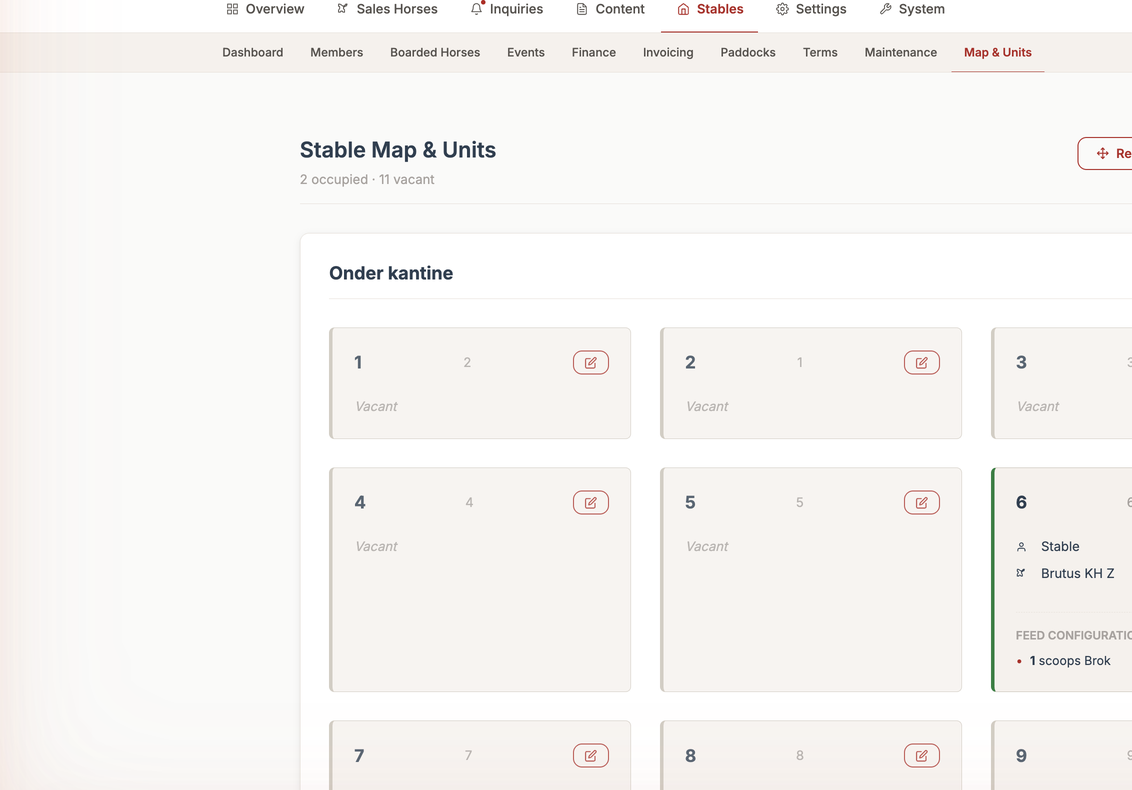
The Map & Units screen shows your barn as a real 2D map — each box sits in the actual grid position you placed it in, one row/aisle at a time (use the row switcher at the top to move between barns or aisles). You can instantly see which boxes are empty, which horses are in which boxes, and review feeding instructions. This is incredibly helpful for staff members doing morning feed runs.
Rearranging the map: turn on Edit Layout and drag any box to an empty cell on the grid to reposition it — useful after a renovation, or simply to make the on-screen map match how the barn is actually laid out. The new position saves the moment you drop it.
3. Moving a Horse or Updating Feed (Update)
Horses move boxes and diets change.
- Click on the specific stall you want to update.
- Click "Edit".
- If a horse is moving out, you can clear the "Horse" and "Member" fields.
- If a diet changes, simply update the "Amount" or "Type" in the Feed Configuration.
- Click "Save". The staff will instantly see the new feeding instructions on their daily runs.
4. Removing a Stable Box (Delete)
If you remodel your barn and a stall no longer exists, you can delete it from the system.
- Open the stall's profile.
- Click "Delete" and confirm. The box will disappear from your barn layout.
Touch Mode — The Barn Screen
Typing on a laptop isn't practical when your hands are full of hay or you're wearing gloves. Touch Mode replaces the detailed table with a grid of big, tappable horse cards, designed to be used on a phone, a wall-mounted tablet, or a large screen fixed near the barn entrance.
Switching between Table view and Touch mode
At the top of the Boarded Horses roster, click Touch mode to switch from the detailed table to the card grid (and Table view to switch back). The system remembers your choice on that device, so a kiosk you leave in touch mode stays that way. On the native mobile app, Touch mode is the default view — the web app keeps the detailed table by default, since an admin at a desk usually wants the columns a card can't show (owner, breeding cycle, vaccination status, and so on).
Staff members only ever see the card grid at their Horses screen — it's the whole point of the staff workspace, so there's no table view to switch to.
Built for large screens too
The card grid isn't just a phone layout shrunk down — on a wide screen (like a tablet or monitor mounted at the barn entrance), the cards themselves grow larger rather than simply adding more small cards side by side. That keeps every card's tap target big and easy to hit from a short distance or with a gloved hand, instead of the grid turning into a wall of tiny boxes.
Logging care — two taps, on purpose
The whole design goal is: tap a horse, tap the activity, done.
- Tap a horse's card to open its action sheet.
- Tap the activity that just happened — fed, turned out, trained, lunged, and so on.
That's it — the entry is logged immediately, with your name and the time attached, and appears in that horse's 7-day activity timeline (see Health Records).
Logging the same task for several horses at once: turn on Select mode, tap every horse the task applies to, then tap the activity once — it's logged for all of them in one go. Handy for a vet visit or a whole-barn task like "turned out" on a nice morning.
Avoiding accidental double-entries: if a horse already has an activity logged for today and you tap that same activity again, nothing is logged straight away — instead the button asks you to tap it a second time to confirm. This protects against a stray tap while still letting you log something twice on purpose (e.g. turned out morning and afternoon).
Raising and resolving a vet or farrier callout
From the same action sheet, staff and admins can flag that a horse needs a vet or farrier visit — this shows as a standing alert badge on the horse's card until it's dealt with. Only an admin can clear (resolve) an alert once the visit has happened; staff can raise a callout but can't dismiss it themselves, so nothing gets quietly forgotten.
Checking on a horse without leaving the grid
Tapping the small detail icon on a card (rather than the card itself) opens that horse's 7-day activity timeline right there — a quick summary of what's been logged for that horse recently, without navigating away to a full profile page.
Works without an internet connection
If the barn's Wi-Fi drops, taps you make in touch mode still register — they queue up locally and sync automatically the moment the connection comes back, with a clear indicator while a write is pending. Nothing needs to be redone once you're back online.
A kiosk that doesn't lose track of the day
If a tablet is left running touch mode overnight, "today's sheet" switches over automatically at midnight, so entries always land on the correct day instead of a screen that was opened yesterday still writing to yesterday's date.
For a wall-mounted screen, tap the fullscreen icon to hide the browser's address bar and other chrome, turning the grid into a dedicated kiosk display.
🤖 Need help?
Remember that the AI Support Chatbot is available in the bottom corner of this (and every) admin screen. If you get stuck or have questions about how this page works, just click the chat bubble and ask!